As a forward to this lesson, and as a reminder, The Collegian prescribes to the National Press Photographers Association Code of Ethics for shooting and publishing of photographs.
That means reporters, photographers and editors CAN’T manipulate photos beyond, essentially, what is traditionally done in the dark room. We strive for accuracy and actual representation in the images we publish, specifically maintaining “the integrity of the photographer moment.”
We absolutely, under no circumstances:
- Remove elements from a photograph
- Add elements
- Flip frames to better fit a page
- Clone or blur parts of images to make them “look better”
- Make an image unrecognizable from its original version
It’s your job to make your subjects look real, not better. Remember that.
Step 1: Import photo from the memory card
On a 27-inch iMac (all but one are in Shima 204), insert the memory card from the camera into the SD card slot in the back. The card will appear on the desktop. Navigate to find the images and move them to the appropriate folder within “Collegian.”
On the drive, there are files for each of the issues for the semester.
Inside the proper issue folder, click “Photos.” In that folder, create a new folder and name it whatever subject matter you shot.
Example: Collegian>Collegian>Issue 2>Photos>Club Rush
“Club Rush” is the folder YOU created.
Step 2: Open the photo in Photoshop
This can be accomplished two ways:
- Drag the photo from the folder onto the Photoshop icon
- Right click for “Open with … Adobe Photoshop CC 15”
Step 3: Examine the image

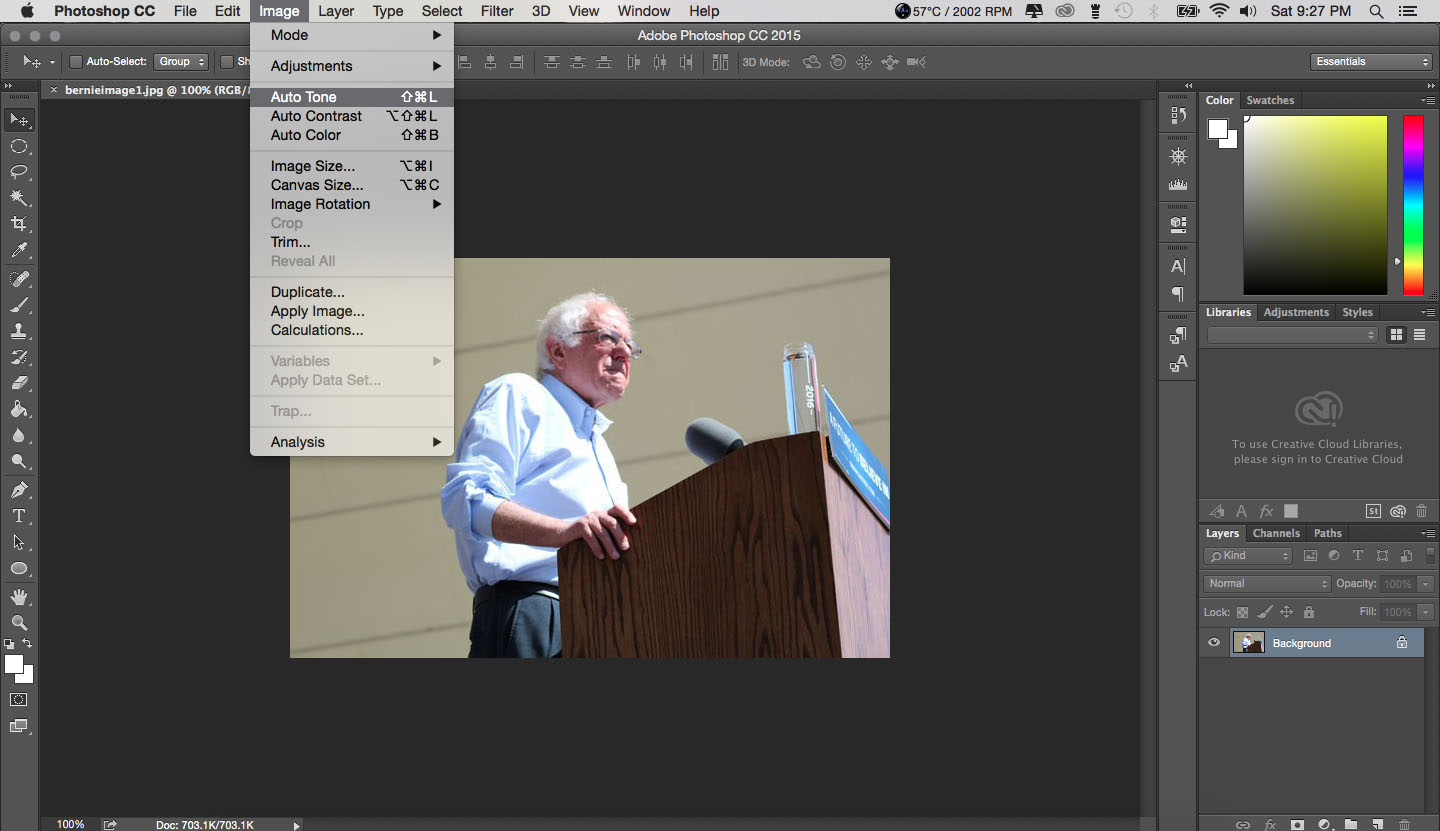
Let’s say this is your base image. The Fall 2016 Collegian Opinion Editor, Zach Merces, shot this image. It is functionally good. The lighting is good. But let’s say you are worried that Sen. Bernie Sanders will be too light on the page and you want him to stand out more. You’ll need to tone the image.
Step 4: Toning
The shortcut most page designers take is to “Auto Tone” an image. That can be accomplished in one click.

In this case, choosing to Auto Tone wouldn’t do much for the image. This is a result of using the Auto Tone filter:

Here’s a side by side comparison:
Before |
After |
|---|
Auto Tone doesn’t do much for this photo. Instead, you may need to use a more advance filter for this image.
Step 5: Advanced Adjustments
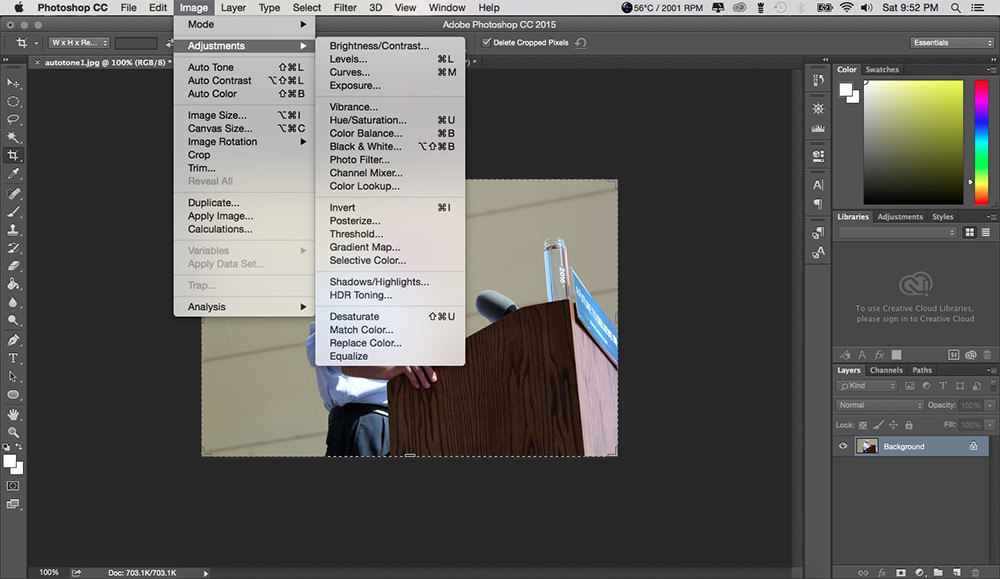
Photoshop offers an array of advanced Adjustments that help photographers tone their images.

Levels and Curves are the Adjustments that deal with. You may pull up the Histograms with each of the Adjustment types.
This is a way to play around with the Tone to make the photo either lighter or darker, depending on preference.
To read more about Levels, view the Photoshop tutorial here. To read more about Curves, view the Photoshop tutorial here.
NOTE: If a photo is too dark to begin with, there is often very little that can be done to “save it.” There are some photos that just can’t be used, no matter what happens in post-production. Consider this: The best way to “zoom in” is often to take a few steps forward. Learn from your mistakes. Don’t take bad photos and expect good reproduction.