In most cases, The Collegian uses full-size images for print. For the website, however, we reduce image size and quality to save server space and prevent people from stealing our images for re-use. For single images, it’s a simple process. If you want to process multiple photos at once, see the instructions for batch processing images.
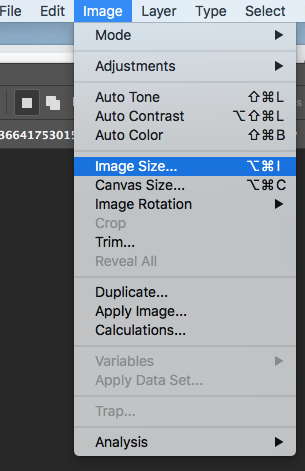
1. After opening your image, go to Image>Image Size.
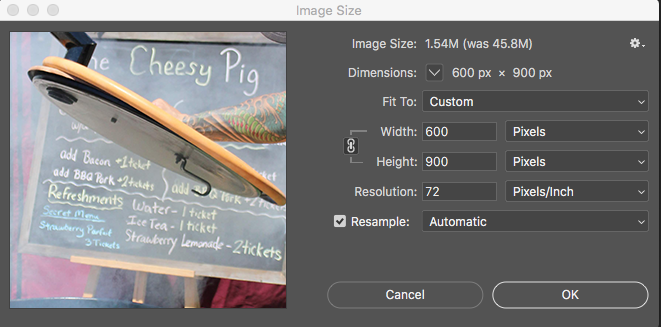
2. For web, we reduce the resolution to 72 DPI. Note that the image size in the above example will be reduced from 45 mb to 1.5 mb.
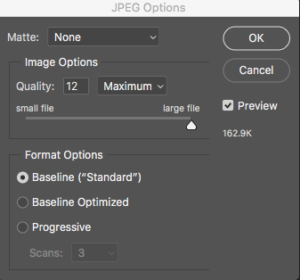
3. Always File>Save As to prevent overwriting the original, full-size image. Save the file as a .jpeg.
- All photos uploaded to deltacollegian.net should be under 1 mb. This is to save server space and prevent people from stealing and reusing our photos. Check the filesize, under the preview checkbox in the above screenshot. If it is above 1 mb, reduce the image quality until it is less than 1 mb.
4. Title it “photonameWEB.”
5. Make sure you don’t save over your original images, doing so will destroy your archive if you ever need it.